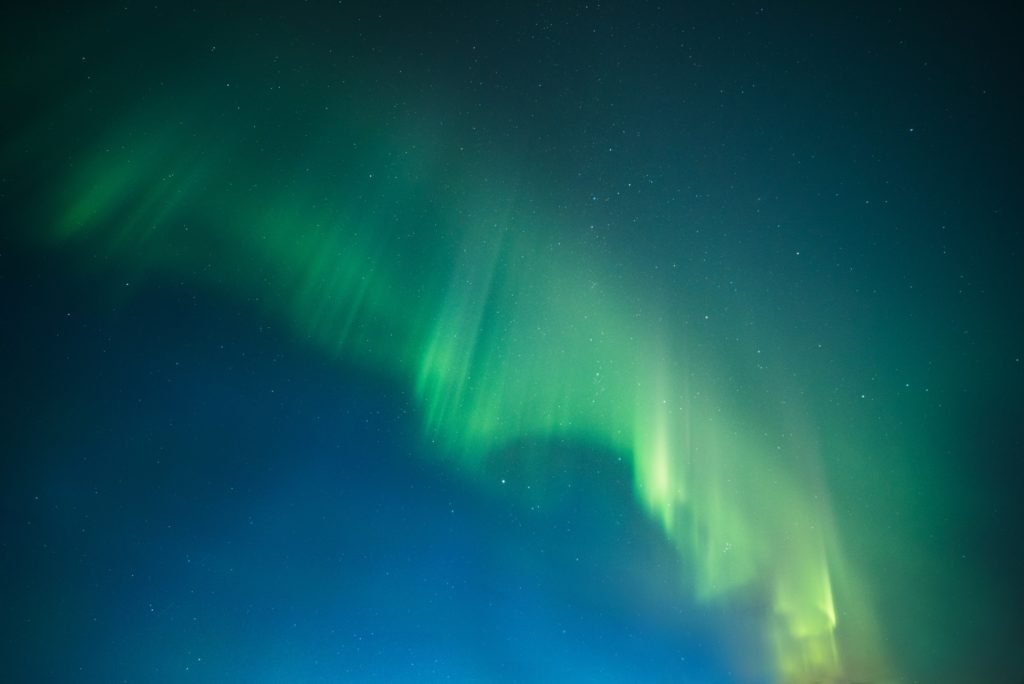
In this article, we have reviewed the best cameras and lenses for northern lights photography and some crucial tips on how to photograph Northern Lights.
Have you ever been to the Arctic Circle to see the stunning Northern Lights?
Well, though it is a dream of many, not everyone gets to witness the green arcs, mesmerizing bands that resemble green drapes. Imagine the exquisite sight of the pulsing coronas when you lift up your head. All of these called Aurora Borealis are happening at the moment, even when you are reading this guide.
If you are one of those planning to travel to the Arctic Circle to see them and capture the enchantment, we will let you what you exactly need.
The best time to visit the Arctic Circle is during the months of September till March, as this is the time the nights are long and quite dark. But, remember that you might not be lucky enough to see these Northern Lights on your very first visit.
Plan for a week’s schedule, avoid the week when there is a full moon and be armed with the information as well as the right equipment you need to seek them out successfully.
So, let’s start learning with the Northern Lights Photography – The Kool Guide!
HOW TO PHOTOGRAPH THE NORTHERN LIGHTS?
It is important for any photographer to learn about the best settings that work when you want to capture the Northern Lights. You need to be aware of the settings of the equipment you intend to carry and also plan the time and place to take the best shots.
CAMERA EQUIPMENT
Every photographer, be it a beginner or an experienced one, needs to have the best equipment when they are on a quest to Arctic Circle. There are a number of cameras and lenses that are perfect to shoot the Northern Lights and it is important you choose one accordingly.
A Tripod: It always helps to carry a sturdy tripod as it does not slip or even shake over the 10 or 20-second exposure. Never opt for low-quality tripods as they tend to produce bad image quality due to the movement they cause. This can also create images that are just out of focus.
A Camera that has manual mode functionality: Having a manual mode function on your camera comes in handy as you get to adjust the independent camera settings like the ISO, the shutter speed, and the F-stop.
You can also pick up a lens that suits your camera and is ideal for night sky photography. Brands like Nikon, Canon, and Sony have special lenses that are well-suited for night photography.
Let us know and have a sneak peek at the gear you might want to carry.
The Recommended Gear
A Full Frame Camera – Make sure you carry a full frame or a 35 mm camera as it provides great picture quality. You can easily shoot using these even in low light conditions and these absolutely make no noise at all. Some of the best full-frame cameras for northern lights photography are the Nikon D810 and the Sony a7RII.
A Wide-Angle Lens – If you want to capture landscapes that are crowned with the northern lights, you certainly need to carry a wide-angle lens. When you are choosing one, make sure the lens has a minimum f-stop value of f/2.8 – f/4. F/2.8 is the most recommended of them all.
When you use the f/2.8 lens, the wide aperture opening allows more light to pass through, which makes it just perfect for Northern Light photography.
PLAN YOUR SHOOT
By planning your shoot, you can be assured that you are not wasting the night with just the hope to get some amazing shots of the northern lights. Just follow the steps mentioned below to capture some enchanting pictures.
Find the dark skies – Finding the area that has dark sides in the Arctic Circle might not be as challenging as you think. You can check the “Blue Marble Light Pollution Map” which is provided by Google and NASA.
You can find black areas on the map and these are free of light pollution and the white and great areas are said to have very high light pollution. You can pick up the black areas as shooting in the dark not only provides the best results but the images are filled with detail and vivid colors.
Shoot when the sky is clear – This is quite important if you want to get some best quality shots of the northern lights. Though you can photograph the lights when the sky is partially cloudy, the result might not meet up to your expectations.
So, always choose nights when the sky is absolutely clear.
You can learn about the local weather to know about the cloud cover every night. You can shoot when the cloud cover is anywhere between 0% to 20%.
Professional photographers often use the website “MeteoStar Weather Satellite Imagery Maps of the Northern Hemisphere” to know the cloud cover conditions. The website has an Infrared setting that also provides the reading of temperatures to watch the movement of the clouds.
While all this study seems unnecessary, this helps if you wish to capture shots of the northern lights like no other. Learning such information takes your photography planning to the very next level and it is interesting as well.
Check the activity – Now that you are clear about the dark sky and the cloud movement, you need to be certain about the aurora activity for the night you planned. You can make sure of various resources available online to check the same.
It is always recommended to shoot on nights when the KP index is 2 or more, otherwise, you might not be lucky enough to capture much of the aurora movement in the skies. To put it simply, the KP index is also called the aurora activity index and its range is from 0-9.
When the KP-index is 0, you get to see a bare minimum activity and when it is above 2 or 3, you get to witness a good activity. Never choose to shoot when the KP-index rating is more than 5 as it is considered to be a storm.
Mentioned below are a few websites that can help you learn about the northern light’s activity and also showcase the weather forecast –all of which are important when you want to capture amazing images. The websites you can rely on are,
- Space Weather Live OVATION Auroral Forecast
- NOAA POES Auroral Activity Website
- Iceland’s Vedur Aurora Forecast
- Space Weather Aurora Forecast
Now that we have understood what equipment we need to carry and how to choose the perfect night for northern lights photography, it is time we dig deep into some technical stuff.
LEARN TO FOCUS YOUR LENS DURING THE NIGHT

Once you have a clear sky and the right equipment in your hand, it is important to learn a few tricks that will help you capture the best images ever.
To get started, you need to learn to focus the camera lens the right way. With this, it might be near impossible to perform any kind of photography at night.
So, let’s learn about focusing your lens for northern lights photography first. Once you master the skill to focus your lens perfectly during the night, you can get started with learning from the guide.
The northern lights and even the stars are very far from the Earth and hence we need to focus on infinity or a little close to it. This helps you to capture sharp photos of the elements in the sky. A number of lenses have a symbol “∞” which helps the photographers to mark the infinity focus point approximately.
Also, just focusing the lens on the “∞” symbol will not guarantee clear pictures. Lenses have to be adjusted too to make sure that focus is sharp but using the infinity symbol is one good way to start.
As one says, it all comes with experience. If you are out in the Arctic Circle for about a week or ten days, you can spend a few nights trying to shoot the northern lights. This way you can easily narrow down your best options and know which is working well for you.
While there are many methods photographers follow to get the focus of the lens right at night, it all depends on the situation one is shooting.
Experts always suggest having your own tricks based on your photography skills, as when you run into trouble you can use one of those tricks without getting into the panic mode. Experimenting and having enough practice are a few things that will help you find the best solution.
Let us now have a look at some of the tips that can help you with focusing the lens at night.
FOCUSING AT NIGHT
Night photography can be hard and those who are into northern light photography or astrophotography certainly understand the frustrations as autofocus does not tend to work right in many situations.
It is not always that you can use the “∞” mark on your lens, and this is why you need to have your own “bag of tricks”. When shooting at night, it is always advised to stick to manual focusing and use some proven techniques to get the best result.
Let’s first get started with a few basic steps before we learn the trick to get the perfect focus.
Enable the Manual Focus
As we first mentioned, you need to have a camera and the feature to enable manual focus. This is very much important as the autofocus system can be quite unreliable when it comes to night photography and when the sky conditions are dark.
Start by setting your camera or the lens to a manual focus mode. This mode will help you scrutinize the focus you need.
Pre-set the Lens to “∞” Mark
This is important as you get a decent start with the focus. You can even aim for a light source or a night star using this. But you cannot rely on the “∞” mark completely.
While all photographers wish to have a “true infinity focus”, the lenses are not accurate most of the time. This needs to be refined further to achieve the perfect focus. So, let us see how it can be done.
Enable Live View
If you are using a DSLR, you can enable the Live View mode. Once you do this, you can make use of the back LCD monitor for framing the shots. The viewfinder which is on the eye level can often make it hard to see through as it is too dark most of the time.
So, the Live View mode can be used to amplify the scene and magnify the images via the LCD. If you want to focus on the stars, you can use the “magnified Live View mode” on your camera as it is known to be one of the most accurate methods to shoot the night sky.
If you are using a mirrorless camera, you should also be using the LCD monitor but make sure that the back screen is kept on.
The Exposure
Before you start to frame, you set the camera to manual mode and then enter the exposure which you want to use. If you are not certain about the settings you want to use, you can make use of an exposure calculator which is available online. The calculator often helps with the accurate settings that work well for night photography or northern light photography.
In some cases, photographers can also use a high ISO which is near to 6400 or even 12800. You can try to check if the stars or the auroras look clear by focusing.
You can even set the shutter time to long exposure in some cameras as it will increase the live view feed and you will be able to frame as well as focus on a bright star with ease – without the need to increase the ISO.
Center Something Which Is Bright
By pointing the camera at a bright star or a distant object in the sky, you can place it in the center of the frame. You can use the magnification feature of the camera to zoom the live feed and this helps you find the surrounding dimmer stars as well. This method helps you get the focus right.
What do photographers do when they are unable to find a bright object to focus on? Well, it is said that a number of photographers also make use of a laser pointer to create a bright spot and use it as the center of the frame.
One of the most important things you need to keep in mind when using artificial light for focusing is that it should be quite far, at least at a distance of 100 feet or about 30 meters. This is the ideal distance that works well with wide-angle or standard lenses too.
So, if the object you are focusing on is placed at a far-off distance, you should be able to achieve the so-called “true infinity” focus with ease.
Make Use of Focusing Aids
This not only works well with northern lights photography but can do wonders when it comes to astrophotography as well. Photographers can make use of the live view mode and the function of magnification to zoom and view the distant light source.
Using this, they can manually focus until the needed light is seen clearly on the focus. But how does one know that it is really in focus? Well, there are certain indicators that can be used to confirm a good focus and one of them is the size.
When you focus on a star or even on an artificial light source, the very first thing you need to look at is the size. It is a perfect focus when the star looks quite small and more like a pinpoint.
The stars that are out of focus appear quite softer in comparison and also show more color. This can happen due to spherochromatism. Even if the focus is good, all the objects, even the ones that are dimmer, need to look sharp, small, and very bright.
As mentioned another factor one needs to look for is spherochromatism. This phenomenon causes the out-of-focus objects to change colors, thus creating magenta or green-colored halos. This is one of the major problems faced by photographers who are into northern lights photography.
When you have focused on a bright star, it often happens that the star changes color to green when the focus is close and to magenta when the focus is too far. So, when you have a perfect focus, the objects appear in a neutral color.
Time to Shoot
After you have achieved a good focus using the guide, it is time we try a test shot to check the results. Make sure to use the magnification function of your camera to review the image so that you have the focus right.
Taking a test shot can be termed as the last check to make sure you have got it all right. You can even double-check by taking a few shots more and see if the focus is still good or need to be tweaked a little.
Lock and Shoot
Now that you are confident, you can lock down the focus by tapping the focus ring. You can use a gaffer’s tape or a study tape to do so. You need to have something that can stick easily but does not leave behind any residue.
With your focus locked, you might not need to adjust it. So, make sure you do not bump it. Once you are ready, it is time we make sure all other camera settings are just perfect.
Let’s learn about a few camera settings before you take the final shot.
THE CAMERA SETTINGS YOU NEED TO KNOW
Let us now learn as to how to photograph the northern lights using your DSLR camera.
We all know that Aurora is quite dynamic and it keeps moving constantly in the sky. This is one of the main reasons why the settings of your camera need to be dynamic and you will have to change with the passing of time.
Before you go ahead and change the shutter speed, the ISO, and the aperture, you need to follow a basic setup for the camera. The settings you need to follow are mentioned below.
- Make use of the RAW image format for all the pictures as this gives you a lot of control and also a good margin for errors.
- When you shoot in the format mentioned below, you have an option where you can change the white balance settings once you are back to editing the shots.
- When you are shooting the auroras, you can try using the Kelvin mode or the K mode as it is normally called. You can use the values of 2800 – 4000 for the night sky or the aurora photos.
The Depth of the Field and Aperture Settings
Well, it goes without saying that f/2.8 is the best setting if you are into northern lights photography. Photographers can also make use of F-stop values that are f/3.5 or even f/4 as they work well to shoot auroras. Do not open the aperture more than f/2.8 as you might find it hard to focus during the night.
Remember that the key is to allow the needed amount of light so that it hits the sensor on the camera in less time, which in turn helps to maintain a low ISO and also reduces the image noise.
The ISO Settings and the Shutter Speed
Another important aspect you need to focus on is the ISO settings. Both the shutter speed and the ISO settings have to be changed at the same time as they reflect directly on one another.
Once you have started shooting the Northern Lights for a few hours, you would be able to adjust the settings on your own, without much hassle.
Before you go ahead and change the ISO settings and the shutter speed, make sure you ask This question to yourself.
How is the aurora activity?
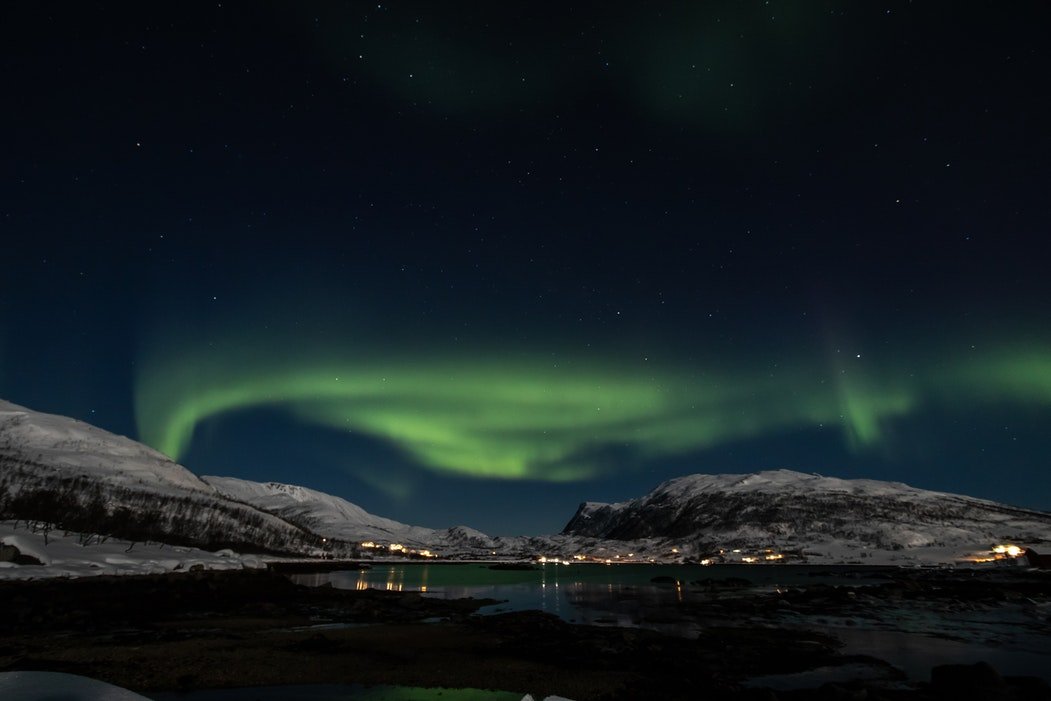
If the aurora activity is more, the northern lights can very quickly move through the sky. If you want to capture the color as well as the detail, you need to choose a shorter exposure time, or else the picture will look more like a color blob.
So, what is the best shutter speed you need to choose for northern lights photography? Like we always say, you can come to a conclusion with trial and error but experts suggest keeping the shutter speed in the range of 5 to 25 seconds. This works well when shootings the northern lights.
When the aurora is moving pretty quickly, you can try an exposure of 5-7 seconds and you can try an exposure of 10-25 seconds when it is not moving quickly. You can just decrease or even increase the shutter speed depending on the situation. The above-mentioned are just a few thumb rules most of them follow.
You also need to adjust the shutter speed based on how bright the northern lights are.
Now that you are aware of the shutter speed, let’s have a look at the ISO value.
As mentioned earlier, the aurora keeps changing speed, color, and brightness, throughout the night. Due to this, it is important you change the settings of the camera to match such a dynamic situation.
To do so, you can increase the ISO settings on the camera so that the images are exposed correctly and have less scene lighting. Make sure no other settings are changed.
You can first start shooting using an ISO in the range of 400-800 and try a practice shot. Once done, check the image for brightness. If you find it is not bright enough, increase the ISO to 1200 and try another shot.
If you still find the image to be less bright, continue increasing the ISO. Most of the time, photographers shoot northern lights using an ISO of about 800 to 4000.
If you find that there are any dark details, the same can be edited during the last phase using software like Photoshop. You can also keep a watch on the histogram to be sure of not losing out on any dark detail on the left side.
Also, you need to be certain that any highlights are not being blown out. In simple terms, you should be careful to check that the histogram is not dropping towards the right-hand side.
Whenever you are into northern lights photography, you need to keep a tab on the Color Histogram too along with the luminance histogram. It happens with newbie photographers that they overexpose the “Green Channel”, due to which the pictures you take can lose color and detail.
Editing the photos using some simple tips and techniques
Now that you have learned about the best techniques and equipment to capture the northern lights, it is time you start experimenting the same. Once you have the pictures ready, you can edit the same using software like Lightroom and Photoshop.
Best Cameras for Northern Lights
You need not be hooked up to an expensive smartphone all the time -especially while you are photo-shooting in icy-cold zones. The Arctic Circle and the South Pole are the coldest regions of the Earth. You barely have the sun penetrating through.
The barren tracts of land are covered with nothing but snow, but the atmospheric setting is dim all through the day.
In this online segment, we are going to have a look at some of the exclusive models. These are DSLR cameras that can help you shoot picture-perfect scenes even in places like Arctic Circle where the temperatures are icy cold all through the year.
Here comes the need for cameras that suit this type of weather. You can look for a mirror-less camera or a DSLR with the following features:
- Lens fixed to infinity focus
- Wider aperture angular view (such as an f 2.8)
- Confirming International standards with an ISO 800 or ISO 1600 emblem
- Exposure time- 10-20 seconds (Depending on how bright the display is)
This way you will be able to shoot out pictures even while the weather lights up the sky dimly. You can shoot out those naked pictures without converting them to jpeg. This way, you get your beautiful portraits done, without relying upon dawn street lights.
These are some of the best cameras for the Northern Lights. Do you want to have a virtual countdown of the same?
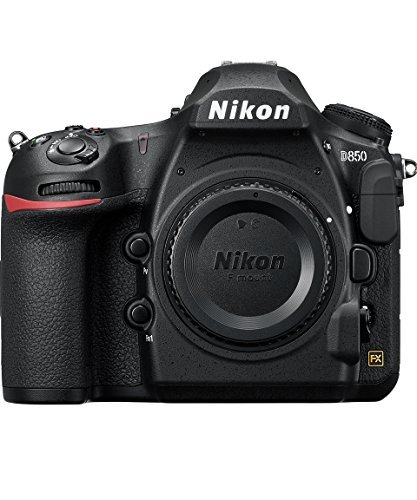
1. Nikon D850
Nikon D850 is one the most versatile DSLRs, you can possibly think of. It has some of the best in-built features to photo-shoot seamlessly. The camera comes with a high-resilience and high-point resolution range.
It measures 8256 X 5504. You can take raw photoshoots without getting worried about the changing weather. With the starting sensor range measuring 45.7 MP, you can take beautiful landscapes or portraits at any given time. During the day!
You can photoshoot at a continuous speed of 7 fps. If your camera batteries are fully charged, it can even touch 9 fps. The Nikon D850 is a DSLR that comes to you with a complete weather-sealed design. You have a beautiful auto-focus system comparable to none other.
As the DSLR is power-packed with exclusive hardware cum software upgrades, photography becomes a seamless affair. You can take picture-perfect snaps pertaining to wildlife, sports, architecture, and natural surroundings.
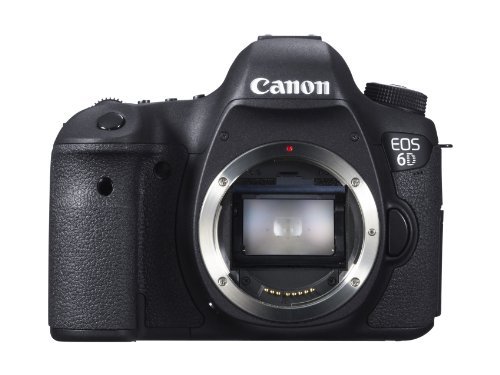
2. Canon 6D
Canon 6D can be used by integrating the new Sigma 50 mm f/1.4 Art Lens. And this can be done in a hassle-free manner. You also discover some of the most superlative features attributed to this particular model. The new Sigma 50 mm lens is exclusively available for use only for Canon holders.
If you are a full-time shooter, this particular model can be a great buy indeed. It comes to you with a Sensor capacity of 20.2 MP. You can take full-frame photographs using the full-frame CMOS sensor.
The full-length resolution measures 5472 X 3648. The auto-focus system is a fabulous one with 11-pointers AF and a cross-type sensor too. Again, you get a wonderful 97% coverage. The images shot will be free from faint landscapes.
You find that Canon 6D has a movie screening facility as well.
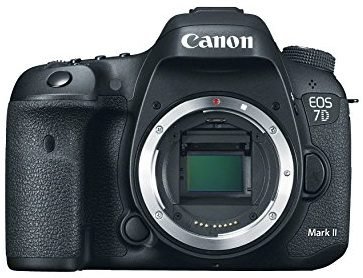
3. Canon 7D Mark II
This model sports a high-end autofocus system wherein there are as many as 65 cross-type focus points. The DSLR is incredibly fast with a stunning 10 fps shooting speed. You have dual processors equipped with 3 EV light sensitivity.
Apart from this, it is completely weatherproof. This is mainly attributed to the magnesium alloy while designing the DSLR.
You have the model quite lightweight as well compared to the bulkier EOS-1 DX. The Canon 7D Mark II is specifically targeted at wildlife, the night sky, and sports photographers wherein picture clarity simply cannot be compromised upon. You also get stunning 100% coverage with this particular model.
Precisely the Canon 7D Mark II just costs $1,800. The buy is, therefore, an affordable one for budget photographers.
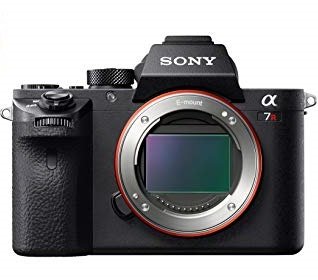
4. Sony A7R II
Sony A7R II is a mirrorless camera if you all didn’t know. It is the latest technology that has been embedded into the Sony A7R version II. The advanced version is, therefore, a popular pick both among hobby photographers and professionals.
The ergonomic design of this particular model lends you a superb grip. It is a faster one with a whopping 399 focus points. You get intense clarity with the brand-new 42MP back-illuminated sensor.
The camera also doesn’t produce noise during the shutter. And also doesn’t create a severe vibration. The technology-infused comprises of an electronic-based front-curtain shutter release option indeed. This way, you don’t get blurred pictures on account of a delayed shutter release. Blurred images are therefore a thing of the past.
With the latest upgrade to the ware, you can take RAW images continuously.
With full HD movie shooting and 100% coverage, nothing can go wrong with this one. The model is one of the best cameras for Northern lights as it covers dim vicinity like none other.
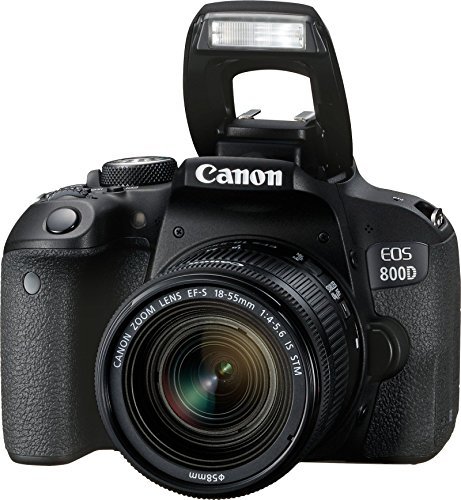
5. Canon EOS 800D
The latest Canon EOS 800D offers numerous options to bring those wide smiles to a camera-loving person. It has the newest T7i technology that lends the DSLR astounding features. Some of these include a faster frame rate, better auto-focus, and a crystal-clear sensor system.
The 24.2-megapixel sensor was an instant rage the moment Canon EOS 800D was released. You find 45 auto-focus points along with a 6 fps shooting speed.
Note: Fps stands for frames per second.
With a stunning resolution width of 6000 X 4000 pixels, you can photoshoot images with the highest degree of clarity. With the superlative features, this particular model offers you, the price is barely $900.
Budget photo enthusiasts will find the accessory a real-time boon indeed.
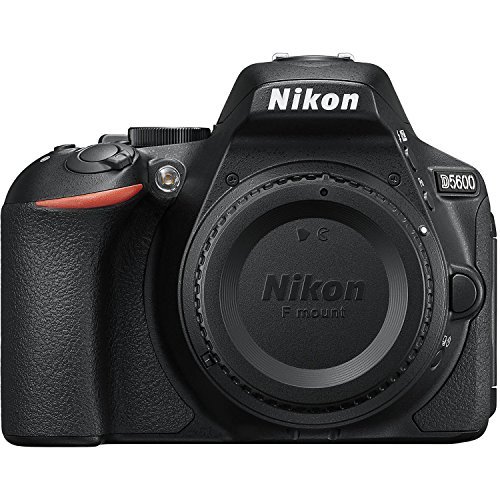
6. Nikon D5600
Nikon D5600 is power-packed with such wonderful features that it is too good to be labeled as a consumer DSLR. Among the previous models of Nikon, the D5600 is the best one indeed. You have the latest technology infused into the same.
This is Snap Bridge. With this particular tech upgrade, you can sync photos to your mobile phone almost instantaneously as you keep clicking pictures on the DSLR.
This way, you can share those wonderful images on Facebook or Twitter. Without waiting to return back from your holiday! You can also see the live viewpoints from remote locations. The sensor resolution offers you a generous 24 megapixels. The image size is 6000 X 4000.
It is a pentamirror brand with a weather shield. You get a 39-point focus with 9 cross-type AF systems. You get a wonderful LCD resolution too. Priced at around $700 per piece, the DSLR lends a fairy tale ending to your budget.
These are some of the best cameras for the Northern Lights. Night sky photo shoots get more exciting with precision auto-focus, sensor capabilities, lightweight case holders, and lots more.
Now that we have learned about some of the best cameras you can buy online for northern light photography, it is time you have a look at some of the best lenses you need to have on hand to get that perfect shot.
Related: Best vlogging cameras under $300 Best Mirrorless Cameras under $400
Best Lenses for Northern Lights
Where do you find the Northern Lights? You find Northern lights in areas that are situated at the extreme northern end of the globe. In other words, you call it the North Pole.
As the region is always covered with snowy landscapes, the area looks dark. The gloomy surroundings lead to a faint zone. To take picture-perfect shoots in this kind of surroundings, you need to choose a wide-angle lens.
Whatever be the make of the camera, some photo enthusiasts go in for a cheaper brand of third-party lens. To go for branded varieties on the focal lens, you can go for a Canon or a Nikon make.
Taking you through some of the best lenses for the Northern Lights:
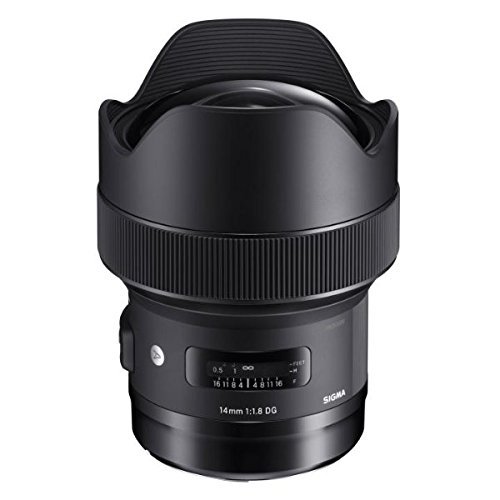
1. Sigma Art 14 mm F1.8 DG HSM
Here comes a detailed review of the Sigma Art 14mm F1.8 DG HSM. This was a wonderful pair of lenses that was released in February 2017. It is the world’s one and only full-frame f/1.8 wide angular lens. Therefore, you will have to endorse the phenomenal achievement in the world of photography without the slightest element of doubt.
The optical formula the designers came up with is exceptionally incredible. You get sharp images sans virtual distortion. Well, the lens typically comprises 3 FLD glass elements, and also four SLD (Special Low Dispersion) glass elements.
Note: FLD stands for ‘F’ grade Low dispersion glass, which means the glass has a lower refractive index than fluorite glass.
This particular formula helps achieve edge-to-edge sharpness and also reduces chromatic aberration. The artistic pair of the lens helps you shoot out landscapes, architecture, and astrophotography.
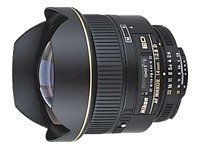
2. Nikon 14MM F2.8D AF
This is a lens brought to you via a leading brand named Nikon. It simply reads as Nikon 14MM F2.8D. This is a full-frame lens that comes to you with Nikon DSLRs, rolled out in the market. The lens is a completely Autofocus one. This is a highly versatile and ultra-dynamic pair of lenses indeed.
You can take dramatic photo shoots covering interiors, cityscapes, and so on.
You can take astonishing shoots even in extremely dim-light settings. Hence the pair of lenses that were released in the year 2006 is simply here to stay.
3. Canon EF 16-35mm f/4L IS USM Lens
The EF 16-35mm f/4L IS model is Canon’s first L series lens that features image stabilization. It is an ultra-wide lens that can take perfect pictures even in extremely dull or sober settings. It comes to you with two UD elements. UD stands for Ultra-low Dispersion. This way, you get sharp images whenever you take photos.
The super spectra coating, that is lined up, with this pair of lenses, makes sure, the glare is reduced to the bare minimum. Those faint or dull images, now become a thing of the past.
Again the entire care is designed with a fluorine coat across the front and rear. This particular aspect makes sure that the pair of lenses is completely water or dust-resistant.
In other words, water particles or dust flakes rarely stick to the filament. The dynamic pair of the lens comes to you with other superlative features added to the same.
These include a nine-blade circular aperture, silent shutter release via the AF or Autofocus mode, focus motor to detect sensor settings, image stabilizers, and full-time manual focusing mode too.
Along with these super-sonic features, the lens comes to you with 4 fps (frames per shoot). The advanced Canon EF 16-35mm f/4L IS USM is a great pair of lenses that facilitate landscape or architecture photography.
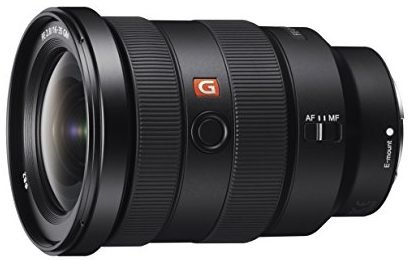
4. Sony SEL1635GM 16-35mm f/2.8-22 Zoom Camera Lens
Sony offers you a great range of mirrorless lenses. The model is one of the best lenses for Northern Lights indeed. The SEL1635GM 16-35mm f/2.8-22 Zoom camera lens is a great pick among professionals as well as amateur photographers. As the name implies, this is a pair of lenses that belongs to the ‘G’ grade.
It is one of the best high-resolution lenses brought to you by Sony. You can take perfect shoot-outs with any high-resolution camera. It is a top-quality lens built across a designer metal body.
You have fabulous zooming facilities. That white tiger from a 4 km radius can be shot to precision indeed. You have the longest lens extension starting at the 16 mm radius.
Sony calls it an IF or an Internal Focus module for the simple reason that the size of images doesn’t change especially when you try focusing pictures at length. The lens is weather resistant.
It is the fluorine coat added to the rear and back cover. Henceforth, the lens is conveniently able to repel water, fluids, or dust. You have 11 circular aperture blades while the filter size is 82mm. The pair of lenses is a top brand from Sony.
5. Samyang 14mm F2.8 ED AS IF USM Ultra-wide-angle lens for Canon
The Samyang 14mm F2.8 ED is an ultra-wide-angle pair of lenses brought to you via a Korean brand named Samyang. A wide angular lens has always been a craze among photo enthusiasts.
You can manually focus the images using the viewfinder. When you take photoshoots during broad daylight, you get a really impressive set of images.
The wide-angular lens makes photo-shoot in natural surroundings a seamless affair. Again, you have a quality encase closure to the way the lens has been designed. The enclosure comes to you via solid metal and high-quality plastic parts. You have 6 aperture blades where you can focus on multi-faceted forms of photography.
These include landscape, architecture, wildlife, and so on. The dimension measures 96 X 117mm. The affordable ultra-wide pair of lenses is, therefore, a great buy indeed.
These are some of the best lenses for the Northern Lights. Again, while you try photo-shooting in forests, the settings can be dark or eerie. You need a good pair of lenses that is able to focus on objects vividly.
Therefore, try investing in a good pair of lenses. Rather than changing the pair of lenses every now and then.
Related: Best Lens for Night Photography Best Canon Lens for Astrophotography
The Final Words
Remember that the best way to get good at something is by trying it all by yourself, and learning by seeing what works and what does not for you. Northern Lights photography is not only exciting but art in itself.
As we already mentioned, spend a few nights trying and practicing the skills mentioned in the guide, under the night sky. This helps you to learn all the concepts with ease.
Remember not to increase the ISO just to obtain bright images, without trying to open the lens’s aperture to its widest possible value. Start by dialing in the maximum exposure time and try maintaining a nice detail within the Northern Lights.
So, it is time you pack your bag with all the equipment needed and get started on your northern lights photography adventure!
